Facebook Groups are an effective marketing tool for attracting new consumers and engaging current ones with unique content, community, and support. Secrecy is sometimes the finest approach to selling your company. We’re referring to Facebook Groups, also known as the VIP approach to receive useful information from and interact with your best consumers.
The math is straightforward. On the one hand, organic Facebook reach is dropping. On the other hand, 1.8 billion individuals claim they use Facebook Groups at least once a month. These opt-in communities provide businesses with an excellent method to avoid the ruthless Facebook news feed algorithm and engage with audiences that are more likely to view and interact with branded postings.
Here’s all you need to know about the benefits of a Facebook Group for your business. Please continue reading to learn how to establish one and expand it into a flourishing and lucrative community.
The benefits of setting up a Facebook Group for your content creation business
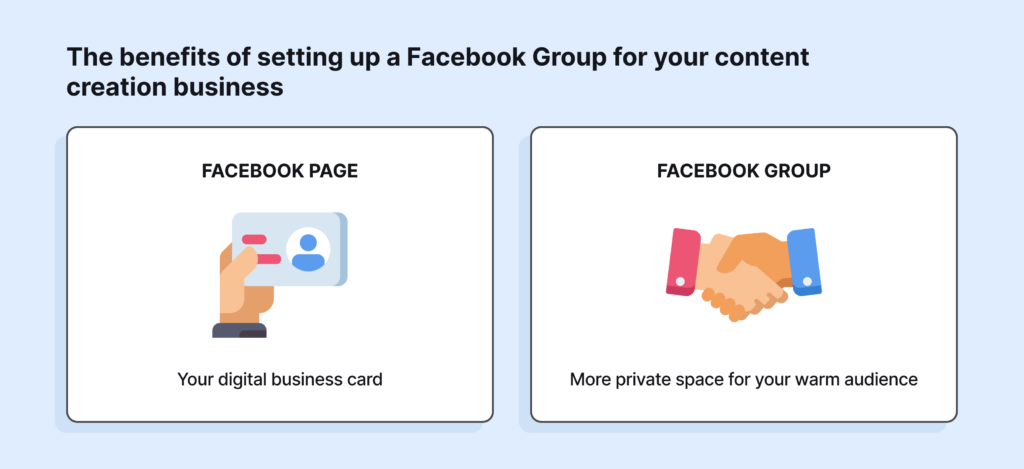
Create long-term customer relations
People desire to be in groups; thus, they are effective. Consider this: Would someone join a group for a firm they don’t particularly like? They are your #1 BFFs, and they’re ready to be your personal cheerleading squad. Solidify and strengthen that relationship by providing unique access to your firm through a Facebook Group, as well as specific material or perks.
Boost your organic reach
Your Facebook Page’s organic reach may be about 5%, but your Group’s reach will be significantly higher. Facebook emphasizes group posts in a user’s newsfeed, so you have a good chance of being seen, especially when compared to your Page postings.
Discover useful market research data
Where else can you obtain direct access to your target audience and get your questions answered by real consumers besides a structured marketing study? The ability to test new techniques and ideas in this small focus group will provide you with a wealth of information. Your great fans will love being “in the know” as an added benefit. It’s a win-win situation. Oh, and did we mention it’s completely free? This data may assist everyone, from a fresh new bootstrapped business to mega-corporations.
Types of Facebook Groups: which one to choose
It is necessary to give some thought to this matter in advance. Because there are a few circumstances in which you may modify the level of privacy associated with your Group, you should make sure that it is configured in the manner in which you intend to maintain it.
Public
Everyone can find public groups in search results. Crucially, the Group’s content, including what members post and comment on, is publicly public. Anybody with access to the internet may also view the complete list of group members. Google has even indexed those group postings and comments. Users can join your Group without the need for an administrator’s permission. It has a “we don’t lock our front doors around here” sense about it.
We would not suggest forming a public group. Because anybody, even spammers, may join, you must pay close attention and eliminate any unsuitable or spam information that may harm your brand’s image. It’s only a matter of time until that happens, so why risk exposing your brand to it? If you establish a public group, you can subsequently convert it to a private one. The change can only occur once since you cannot return from private to public. Make your life easier by being private from the start.
Private: visible
Members in private, visible groups can only see posts and comments within the Group, as well as the member list. Nonetheless, these groups may be found in Facebook search results by all Facebook users.
This exposes no material in your Group. Just the title and description of your Group appear in search results if they match the terms entered into the search window.
People can request to join your Group, which you or another administrator must accept. They will only be allowed to see and publish stuff after that. For 99% of firms, this is the optimal group type. It enables you to maintain membership management and filter out spambots while being publicly discoverable by your target market.
Private: hidden
Private hidden groups, often known as “secret groups,” have the same characteristics as the groups mentioned above, but they do not appear in search results. No one can view group posts, comments, or members, nor can they discover the Group in search results, on or off Facebook. Users must be provided with a direct URL in order to view the group and request membership.
This sort of Group is appropriate for a really Elite, invite-only community that does not want a large number of individuals to join. This sort of Group is commonly associated with a paid product or a specific focus or project group.
If you provide a support group in conjunction with a paid service or product, it makes sense to keep that Group private so that non-purchasers cannot locate and join your Group. Instead, following a sale, you would only provide the link to join to confirmed customers. Nonetheless, in most cases, we recommend going with a private, viewable group.
Coming soon: visual content groups
According to reports, Facebook will soon launch a new group type that would only enable users to publish photographs, videos, or extremely brief text postings. Is it similar to Instagram in a group? This is unlikely to be a good match for most businesses, but it may work well for some, such as creative challenge groups or photographic clubs.
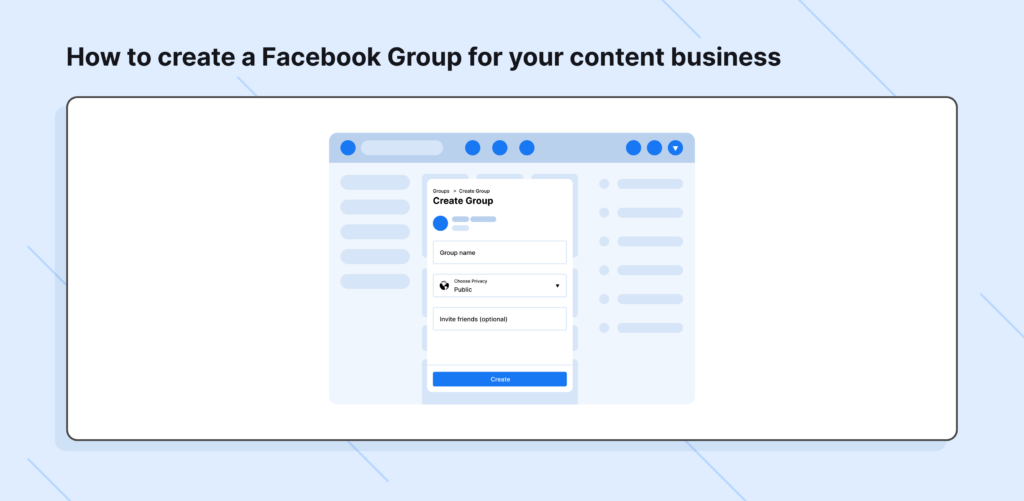
How to create a Facebook Group for your content business
There are many ways to create a Facebook group:
- From a computer
- From a phone in the Facebook app
- From a personal Facebook account
- The best way: From your company’s Facebook Page
Having your Page as the administrator of your Group is a smart idea for two reasons:
- It enables all current Page administrators to administer the Group as well.
- Clients will see the administrator’s name, so keep this to your company brand rather than yourself as an individual.
A step-by-step guide on how to create a Facebook Group
- Login using an administrator account to your company’s Facebook Business Page.
- Locate Pages in the left-hand menu. It may be necessary to click See more and scroll to discover it.
- Choose the Page with which you wish to form a group. Then, under your Page’s menu, select Groups. You don’t see it? You should enable groups on your Page. See how to add tabs and sections to do this.
- Choose to Create a Linked Group.
- Give your Group a name and select the level of privacy. It’s also optional to ask individuals who like your Page to join the Group.
- Your Group is now operational! Remember to complete the About section.
How to add an administrator to a Facebook Group
Whoever starts a Facebook Group instantly becomes an administrator of that Group, regardless of whether they do it using their personal account or their business page.
Follow these procedures in order to add another person or Page as an administrator for a Facebook Group:
- Click Groups, then Your Groups, from the main Facebook page.
- Go to the member list of the Group to which you wish to add an admin. The person or website you wish to add must be a member of the Group already. If they haven’t already, invite them to join.
- Click the three dots next to the person’s or page’s name, then select Invite to be an administrator or Invite to be a moderator.
It makes no difference whether you’re adding a person or a Page as an administrator; the method is the same in either case. Because admins have the ability to remove other admins, including themselves, you may decide that others should serve as moderators instead.
How to change the name of a Facebook Group
If you are an administrator of the Group, you have the ability to modify the name at any time; however, you are only allowed to do it once per 28 days. In addition, a message on Facebook will be sent out to each member of the Group informing them of the name change.
Here’s how to change the name of the Group:
- Click on Groups and then Your Groups from the Facebook home page.
- Under the left side menu, select Settings.
- Next to the name box, click the edit button (pencil icon on the desktop).
- Type your new name and press the Save button.
How to create a post in a Facebook Group
This is the part that is simple! The process of posting in a Facebook group is almost identical to the posting process in any other part of Facebook. Navigate to the Group, compose your post in the appropriate field, and then click the Publish button.
How to remove a Facebook Group
You have the option to stop or delete your Facebook group if you decide you no longer wish to manage it. By pausing the Group, you are able to retain all of its material, including the Group itself, postings, and the member list that is already in place. That is the same as locking the Group, preventing members from adding any new content to the discussion. At any point in time, you have the option to restart participation in your Group.
To pause your Facebook Group:
- Once logged in as an administrator, navigate to your Group.
- Click the three dots at the bottom of the cover photo for the Group.
- Choose the Pause group.
- Choose a reason for halting and then click Proceed.
- Make an announcement to your members explaining why the Group has been put on hold and when you intend to restart it. You may also arrange for it to restart at a specific date and time.
To delete your Facebook Group:
- Go to the Members tab of your Group.
- Before you can delete the Group, you must first remove all of its members. This might be time-consuming since you must personally remove each member from the Group by clicking on their name.
- When you’ve removed everyone, click on your own name (or the name of the Page) and select the Leave group.
- The organization will cease to exist.
When you delete a group, it is removed from existence entirely, and the members of the Group are not informed in any way. Your most valued brand admirers probably didn’t have a better experience than your customer. In addition to this, personally removing all of the members takes a significant amount of time. The best choice is to put your Group on hold, regardless of whether or not you intend to restart it at a later time.
5 tips for Facebook Group promotional success

H3 Establish a clear code of behaviour
This is an excellent concept for any organization, but especially one representing your company. With the group settings, you may add up to ten rules. Your Facebook Group rules might be as simple as reminding members to be courteous or promoting debate or as precise as asking users not to mention rivals or their goods.
You set the tone for the Group’s conduct by declaring your guidelines upfront. Rules can encourage desired conduct while discouraging undesirable activity, such as spamming. Rules also provide you with something to turn to if you need to delete or prohibit a member.
Post welcome messages and news releases
As much as it may be tempting to let individuals chat between themselves, butt in frequently. A weekly welcome message will help new members feel at ease. Plan key notifications for product launches or special events for your group members ahead of time.
Interact with members, but allow them to take the lead
It is your responsibility to keep the Group productive, on track, and courteous. So don’t attempt to exert too much control. Encourage members to initiate dialogues and to feel safe enough to voice their minds.
Your most recent product launch did not impress you as much as you had hoped. Rather than policing unfavourable comments and maintaining the Group as a positive echo chamber, embrace the input. Let users express their real feelings about what went wrong, thank them, and continue the dialogue. You don’t want your members to criticize you constantly, but attempting to regulate people’s speech will only backfire in the long term.
To keep bots out, ask admissions questions.
This is essential for keeping spammers out. When someone joins, you may ask them up to three questions. This allows you to screen new members in various ways. Not only will robots be unable to answer your queries aimed at carbon-based lifeforms, but this will also allow you to limit access to your Group as required. For example, if your Group is solely for existing customers, asking for their work email addresses helps you to determine whether or not they are a client.
In your organization, provide high-value, one-of-a-kind material.
Why should one of your regular consumers or admirers join your organization? What unique benefit are they gaining from it? If you can’t answer it, you have a serious problem. Getting active in your organization requires a higher level of dedication than the usual client unless they are given a compelling reason to do so. These are your most important people!
Final thoughts
There are an infinite number of ways to make the people in your Group feel important, but all it takes is one or two of those ways for it to really take place. Consider what you provide to the Group that would be of use and could be expanded upon. Have you run out of ideas? Don’t be concerned. Just inquire about the desires of the members of your Group. Isn’t it wonderful to have access to a focus group whenever you want it?

 Open Sesame: 225 Engaging Email Subject Lines + Crafting Tips